

The Essential Checklist to Milky Way Photography

Capturing the Milky Way is one of the most rewarding experiences in photography, but success begins long before darkness falls. From selecting the right camera and lens to understanding exposure settings, planning tools, and outdoor clothing, having the proper equipment can make the difference between a frustrating night and an unforgettable one. In this guide, I'll walk through the essential gear I recommend for Milky Way photography, along with the camera settings, accessories, and field-tested tips I use during workshops in Yellowstone, Grand Teton, and Acadia National Parks.
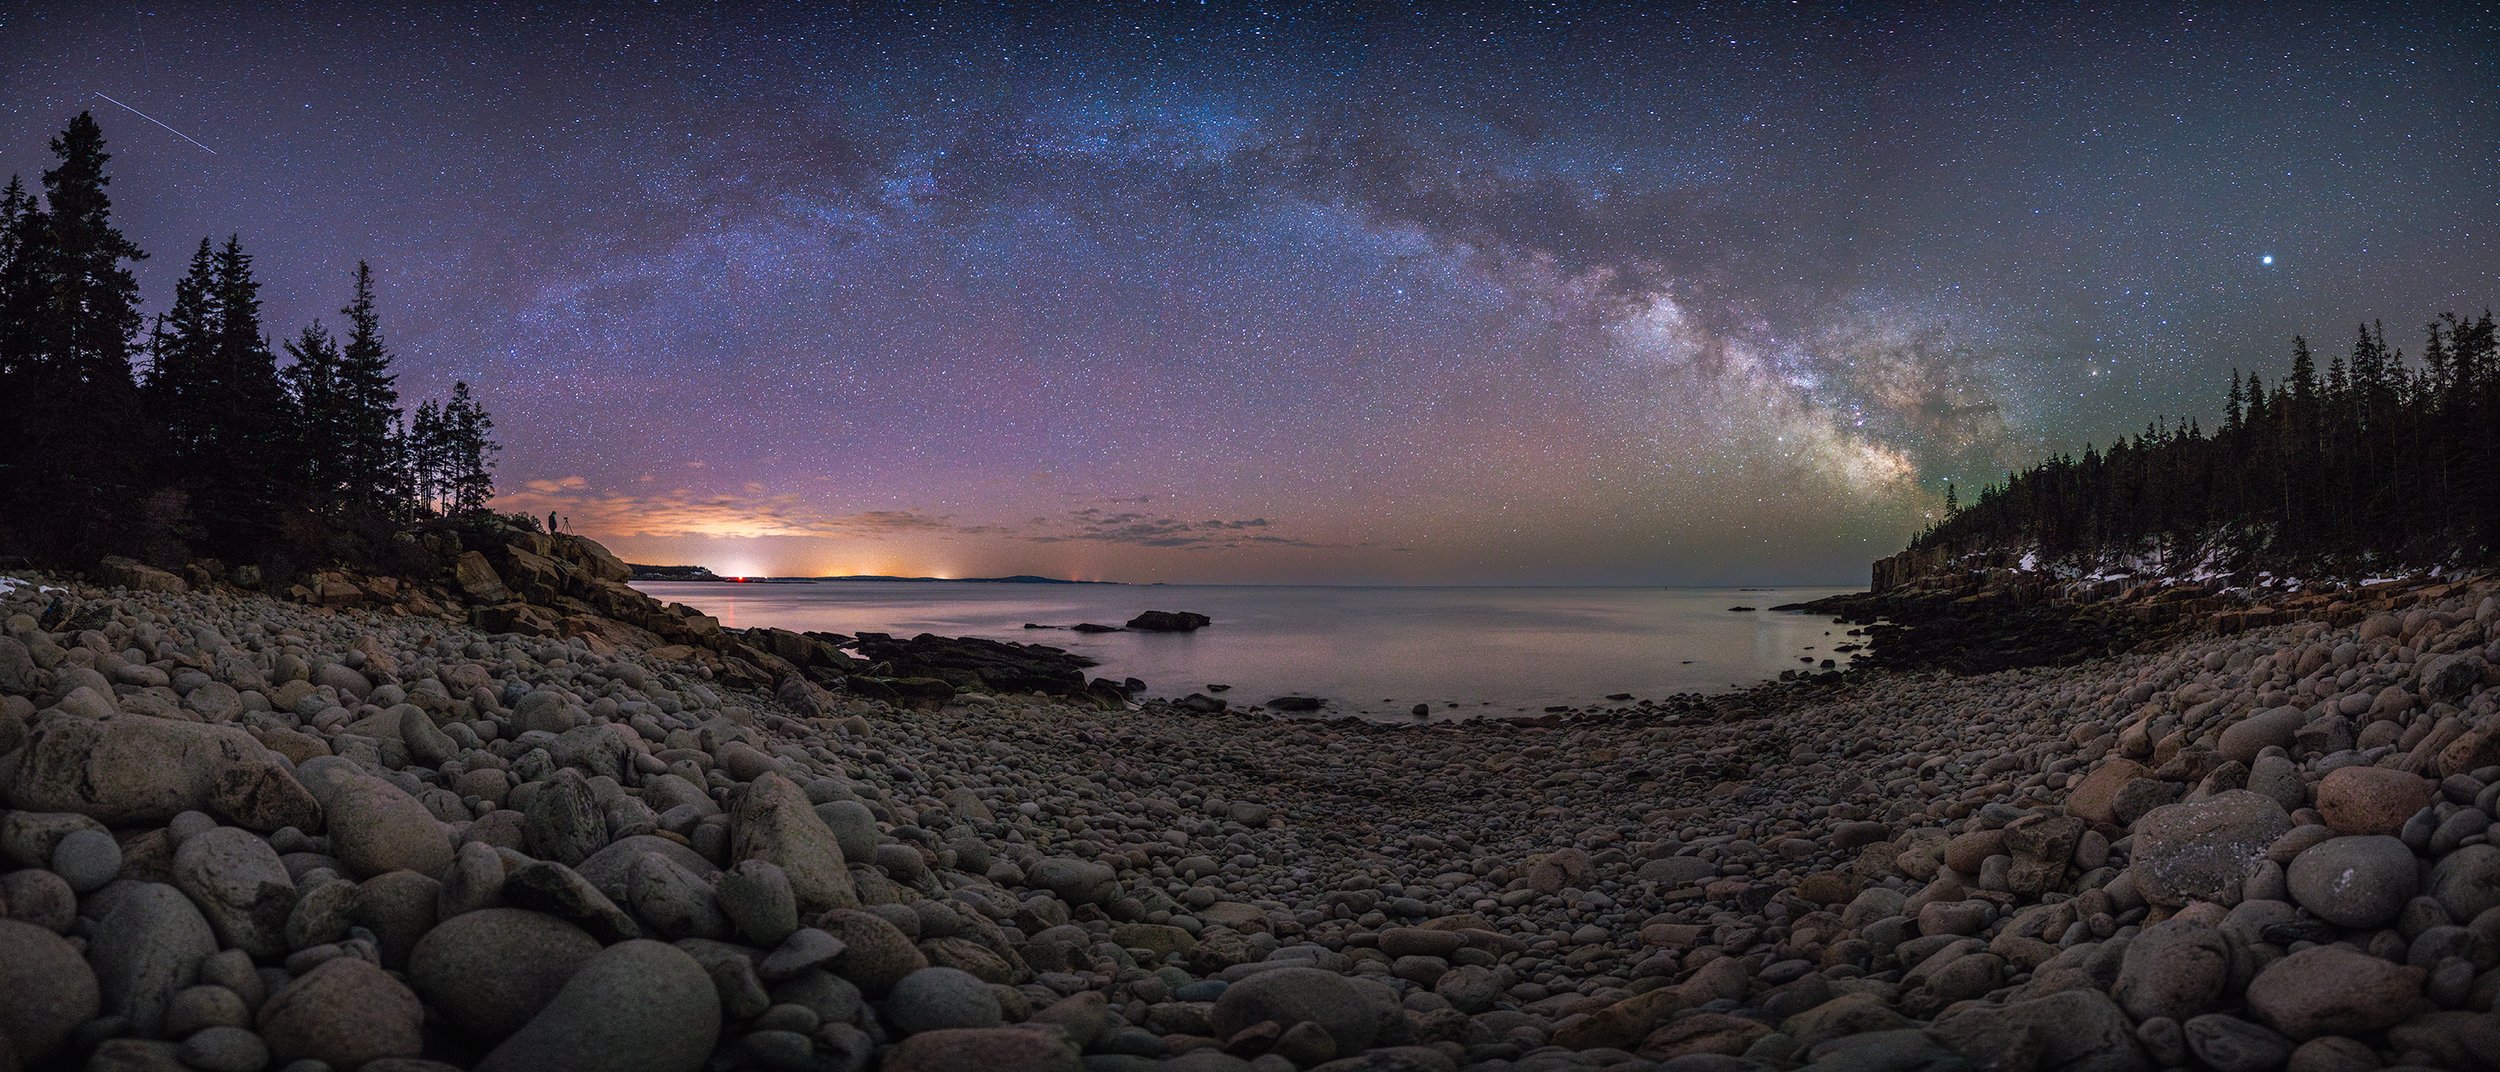
As twilight fades and the first stars begin to appear, a sense of anticipation settles across the landscape. The crowds disappear, temperatures drop, and familiar places transform beneath the glow of the night sky. Then, slowly, the Milky Way rises above the horizon, stretching across the darkness in a river of stars.
Many photographers assume capturing images like this requires expensive equipment or advanced technical skills. While experience certainly helps, success begins with having the right tools and understanding how to use them. Over the years, I've spent countless nights photographing the Milky Way across Yellowstone, Grand Teton, and Acadia National Parks, and I've learned that preparation often matters more than the camera itself.
Whether you're heading out for your first night under the stars or looking to improve your results, this guide covers the essential gear, clothing, settings, and accessories that will help you photograph the Milky Way with confidence.
Why Gear Matters for Milky Way Photography
Night photography pushes both photographers and equipment to their limits. You're working in darkness, often in remote locations, while trying to capture faint starlight using long exposures.
Having the right gear allows you to gather as much light as possible while maintaining image quality and sharpness. It also helps keep you comfortable during long nights outdoors, allowing you to focus on creativity rather than fighting cold temperatures or equipment issues.
The good news? You don't need the most expensive camera on the market. A few key pieces of equipment will have a much bigger impact than constantly upgrading camera bodies.
Essential Camera Equipment
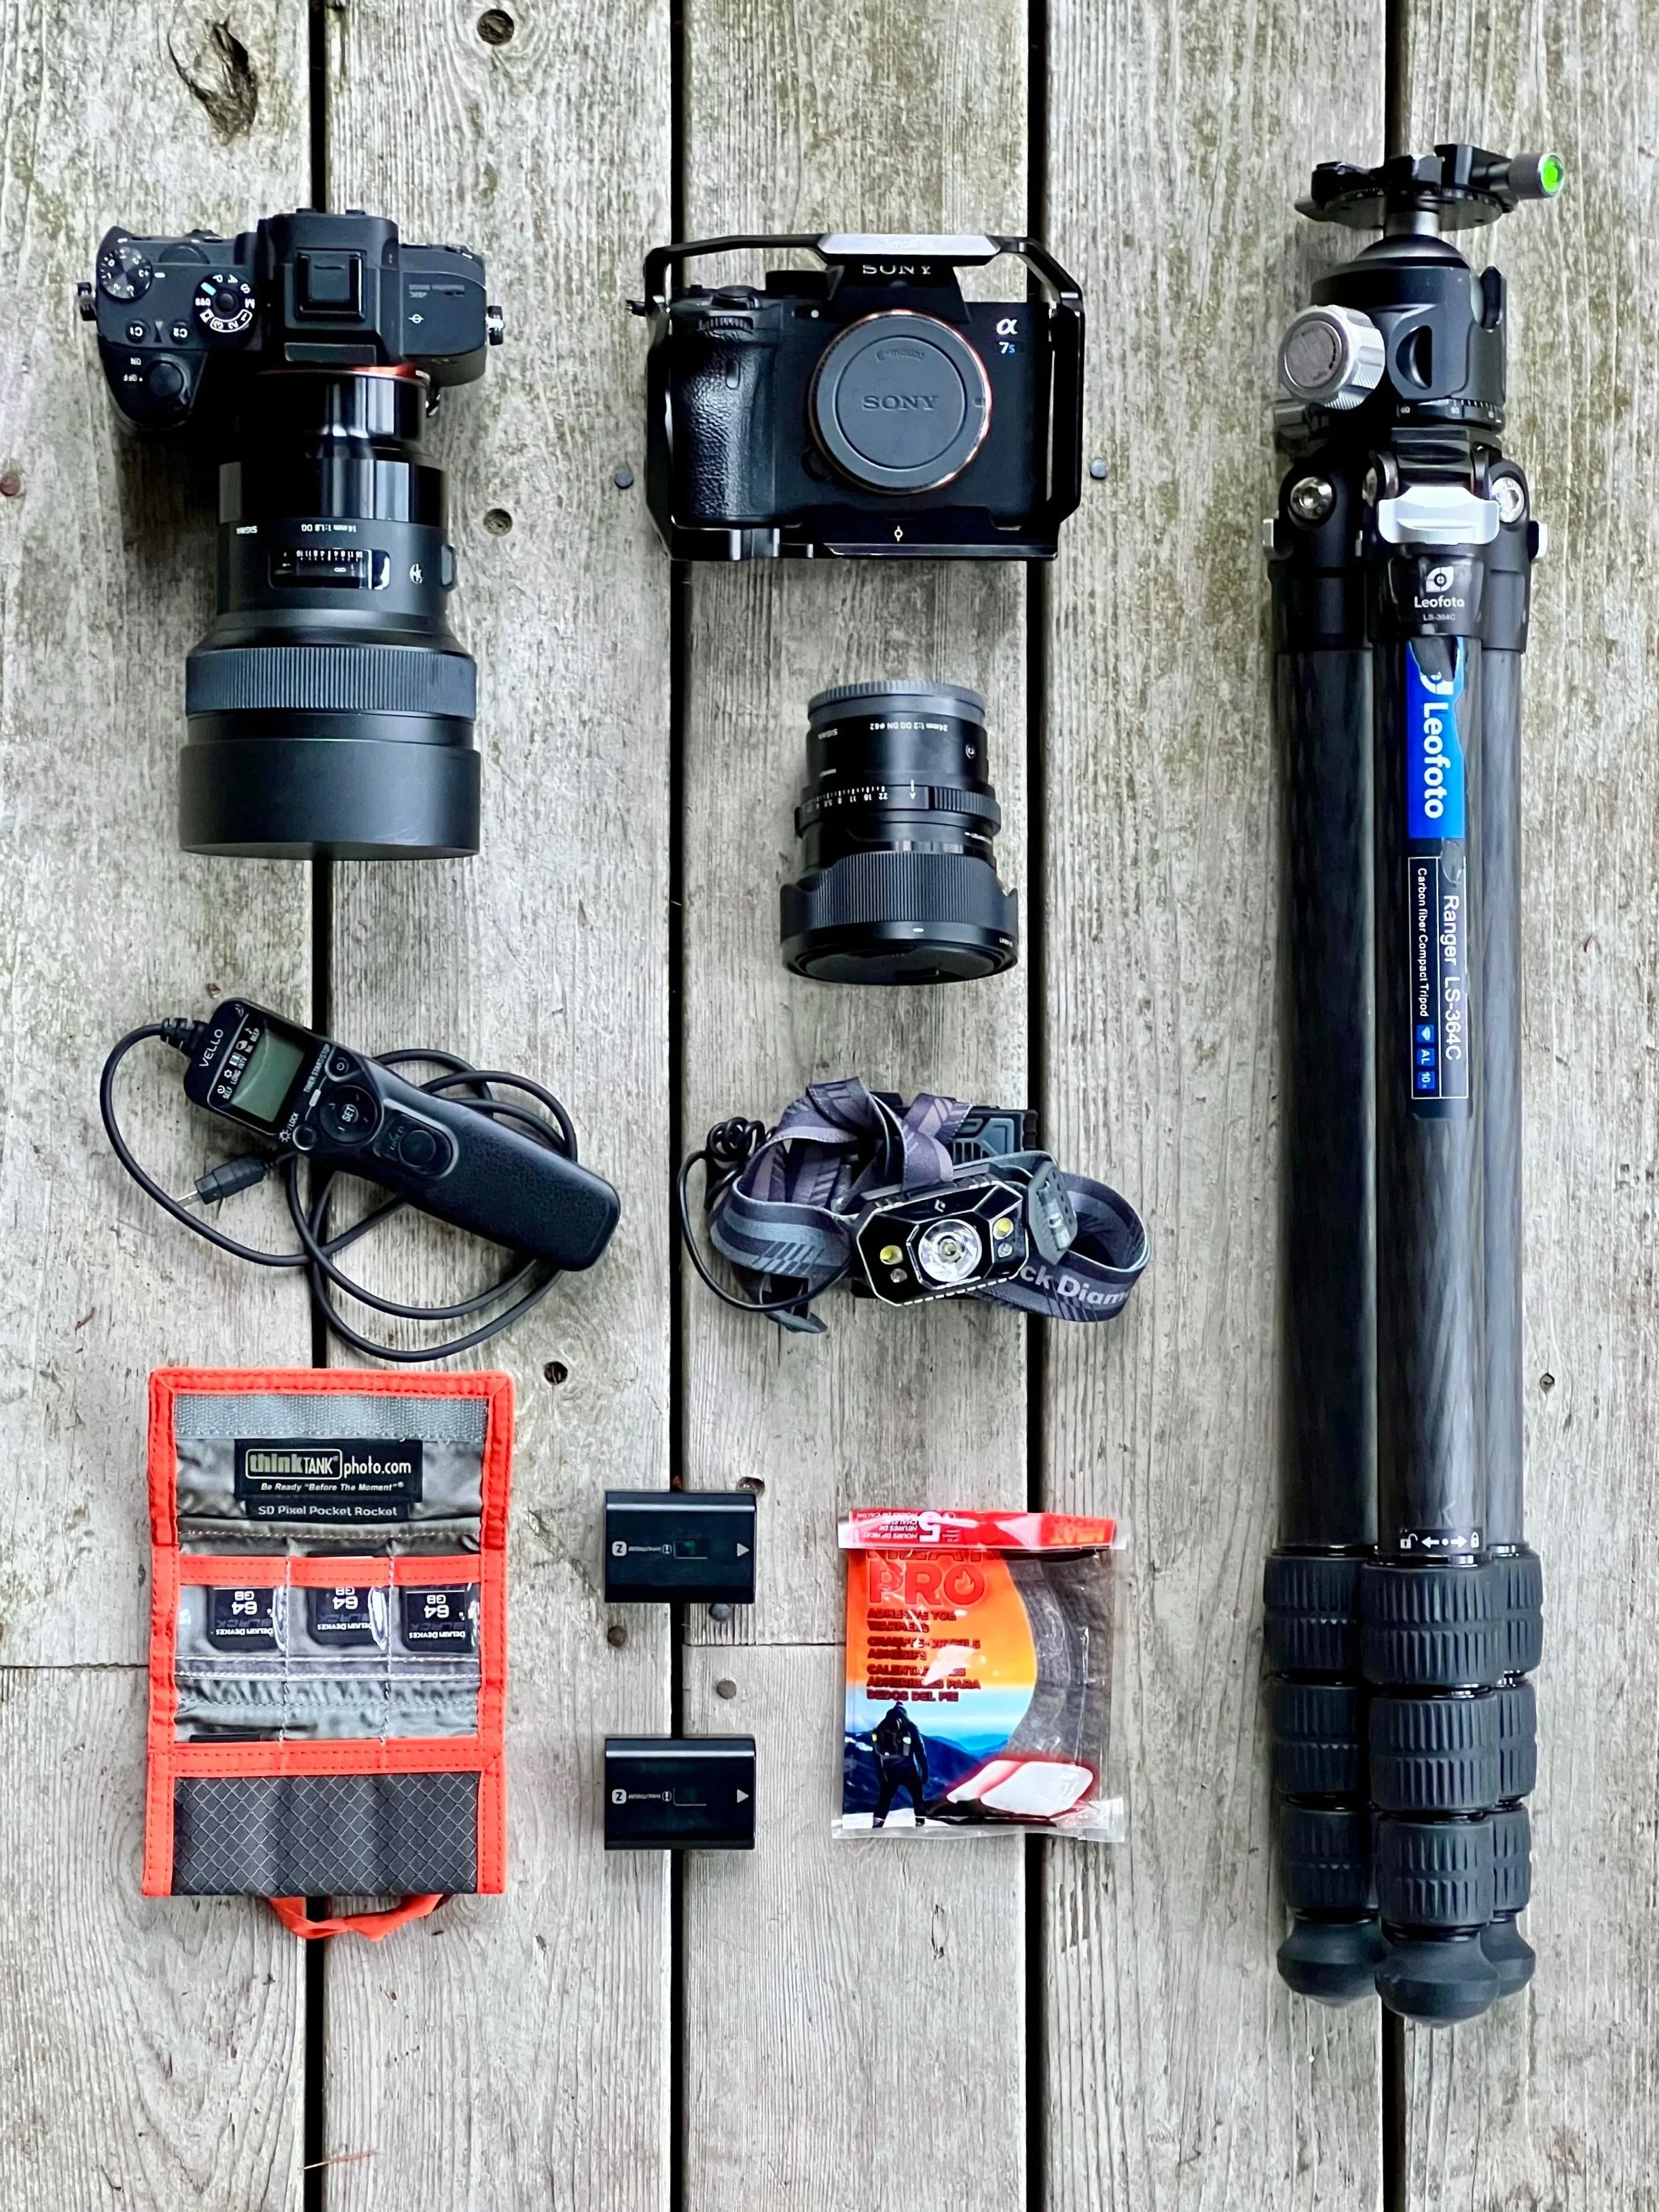
Full-Frame Camera
A full-frame mirrorless camera or DSLR is the ideal choice for Milky Way photography. Larger sensors collect more light and generally produce cleaner images at higher ISO settings.
Many modern cameras perform exceptionally well after dark, making them excellent tools for photographing the night sky.
Wide-Angle Fast Aperture Lens
If there is one piece of equipment worth investing in, it's your lens.
For Milky Way photography, I recommend:
Focal lengths between 14mm and 24mm
Maximum aperture of f/2.8 or faster
Manual focus capability
Popular choices include:
14mm f/1.8
20mm f/1.8
24mm f/1.4
14-24mm f/2.8 zoom lenses
Wide-angle lenses allow longer exposures before stars begin to trail, while fast apertures collect significantly more light from the night sky.
Sturdy Tripod and Ball Head
Your tripod is every bit as important as your camera.
Even the sharpest lens cannot compensate for a tripod that vibrates in the wind. Look for:
Stable construction
Quality ball head
Secure locking mechanisms
Adequate weight capacity
A stable tripod becomes even more important when shooting panoramas or time-lapse sequences.
Shutter Release Cable
A remote shutter release eliminates camera movement when triggering exposures.
If you don't have one, a 2-second self-timer is a simple alternative.
Headlamp with Red Light Mode
A low-intensity headlamp is essential for working safely after dark.
Choose one with:
Adjustable brightness
Red light mode
Long battery life
Red light preserves your night vision while minimizing disturbance to other photographers.
Dew Prevention
One of the most overlooked challenges in night photography is condensation.
Many photographers spend thousands of dollars on cameras and lenses only to have their lens fog over halfway through the night.
Along the coast of Maine, in Yellowstone's river valleys, and during humid summer nights, dew can quickly ruin a Milky Way session or an all-night time-lapse.
I strongly recommend using a LensMuff or similar dew-prevention system to keep your optics clear throughout the night.
Additional Camera Essentials
Don't forget:
Extra batteries
Extra memory cards
Lens cleaning cloth
Small backpack for gear organization
Rain cover or emergency plastic bag
Cold temperatures can drain batteries quickly, so carrying spares is always a good idea.
Essential Outdoor Clothing
Temperatures often feel much colder at night than photographers expect.
Even during summer, standing still for hours under the stars can become surprisingly uncomfortable.
I recommend bringing:
Hiking boots
Moisture-wicking base layers
Insulating mid-layers
Windproof or waterproof outer layer
Warm hat
Gloves
Hand warmers
Dressing in layers allows you to adapt to changing conditions throughout the night.
Recommended Accessories
A few comfort items can dramatically improve your experience in the field.
Consider bringing:
Small camp chair
Water bottle
Thermos with coffee, tea, or hot chocolate
Snacks
Bug spray (seasonal)
Portable battery bank
Small towel for moisture or dew
When photographing time-lapses or waiting for the Milky Way to rise, these small comforts become surprisingly valuable.
Camera Setup Before Darkness Falls
Before heading into the field, take a few minutes to configure your camera properly.
Recommended Camera Settings
Shoot in RAW
Color Space: Adobe RGB
Manual Mode
Manual Focus
Autofocus OFF
Image Stabilization OFF
Sensor Stabilization OFF
Long Exposure Noise Reduction OFF
High ISO Noise Reduction OFF
LCD Brightness at Minimum
Viewfinder Brightness at Minimum
Disable Focus Confirmation Beep
Disable Automatic Image Review
Display Histogram if Available
Lowering screen brightness helps preserve your night vision and prevents you from accidentally overestimating image brightness in the field.
Starting Exposure Settings for the Milky Way
Every night sky is different, but these settings provide an excellent starting point:
Exposure
Shutter Speed: 20 to 25 seconds
Aperture: f/1.4 to f/2.8
ISO: 3200 to 6400
White Balance
3500K to 3700K
These settings typically produce a balanced exposure that captures both the Milky Way and foreground detail.
Remember that moonlight, atmospheric conditions, light pollution, and camera performance will influence your final settings. Learning to read the histogram and make adjustments is an important part of becoming a successful night photographer.
Planning for Success
Great Milky Way photographs begin long before sunset.
Before every outing, I recommend checking:
Cloud cover forecasts
Moon phase
Moonrise and moonset times
Milky Way core visibility
Weather conditions
Wind forecasts
Photography planning apps can help visualize the night sky and determine exactly where the Milky Way will appear.
Whenever possible, scout your composition during daylight hours. Finding foreground elements is much easier before darkness falls.
Arriving before sunset also gives you time to set up safely and become familiar with your surroundings.
Want to Dive Deeper?
This guide focuses on the equipment, clothing, and preparation needed for a successful night under the stars. Once you have the right gear in hand, the next step is learning how to plan, compose, focus, expose, and process Milky Way images effectively.
For a complete step-by-step walkthrough, be sure to read our Milky Way Photography: The Ultimate Guide, where we cover everything from finding dark skies and planning compositions to focusing in darkness, understanding exposure settings, and creating compelling night sky photographs.
Whether you're capturing your very first Milky Way image or refining your astrophotography workflow, the guide provides a comprehensive foundation for photographing our galaxy with confidence.
Read the full guide here:
Milky Way Photography: The Ultimate Guide
Safety Considerations
Many of the best night photography locations are remote and isolated.
Always carry:
Fully charged phone
Portable battery bank
Basic first aid kit
Emergency blanket
If you're photographing alone, make sure someone knows where you're going and when you expect to return.
Safety should always come before photography.
Final Thoughts
Milky Way photography doesn't require an endless collection of equipment. A capable camera, a fast wide-angle lens, a sturdy tripod, and a few carefully chosen accessories will take you much farther than constantly chasing the latest gear.
The real magic happens when preparation meets opportunity. Understanding your equipment, planning your shoot, and spending time beneath the stars will ultimately matter far more than any individual piece of gear.
Every photographer remembers their first truly successful Milky Way image. It begins with preparation, patience, and a willingness to venture into the darkness long after most people have gone home.
The stars are waiting.
Explore upcoming adventures:
Yellowstone Tours - https://www.wildscapeadventure.com/wild-yellowstone
Call of the Wild - https://www.wildscapeadventure.com/call-of-the-wild
Mastering the Night Sky - https://www.wildscapeadventure.com/mastering-the-night-sky
Written by Christopher Georgia, founder of Wildscape Adventure
Leading wildlife and astrophotography tours & workshops across Yellowstone, Grand Teton, and Acadia National Parks
📞 (406) 936-0414
✉️ wildscapeadventuretours@gmail.com
🌐 https://www.wildscapeadventure.com